TLDR:
This article gives an introduction on how to modify the existing zsh theme to one’s own liking.
Source Code: Github
Back story:
As being a React Native Developer I’ve to spend a lot of time looking at my iterm2 terminal emulator. So I decided to make that emulator look prettier.
I am using zsh with my iterm2. So, like any other beginner, I have installed oh-my-zsh. oh-my-zsh got many themes. I am particularly interested in the minimalistic theme robbyrussell.zsh-theme.

I liked the look and feel, it doesn’t bombard me with a bunch of information that according to my preferences I don’t need. Like the full path of my current directory. Don’t get me wrong, many of you may need that information for your workflow but in my case, I don’t need that.
Although I like the simple approach I want something that I can tell that “this is mine”. So I have tried modifying it to my likings. This article describes my journey.
Prerequisite:
This article is for those who knows/have
- zsh installed
- oh-my-zsh installed
- iterm2 (or any other terminal emulator that supports 24 bit color or true color) installed
Set up:
After doing the all the things in previous prerequisite section go to the following directory
| |
Now create a file with the extension .zsh-theme (in my case I named the file as mrp.zsh-theme) and copy-paste the content of robbyrussell.zsh-theme to our customer .zsh-theme file.
Now open ~.zshrc file and put the following line
| |
PROMPT:
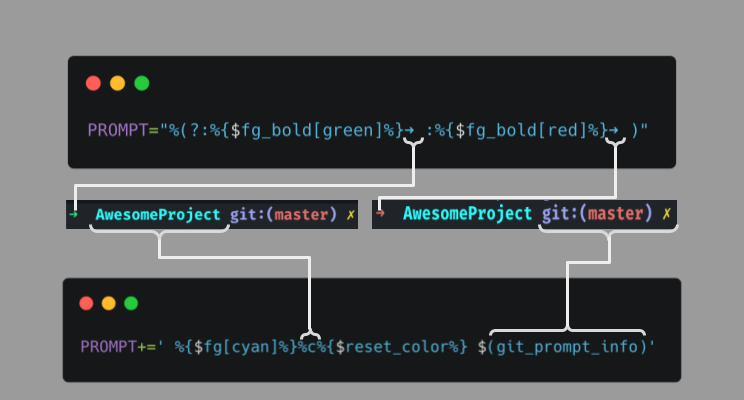
Now let’s look at the first line of our robbyrussell.zsh-theme
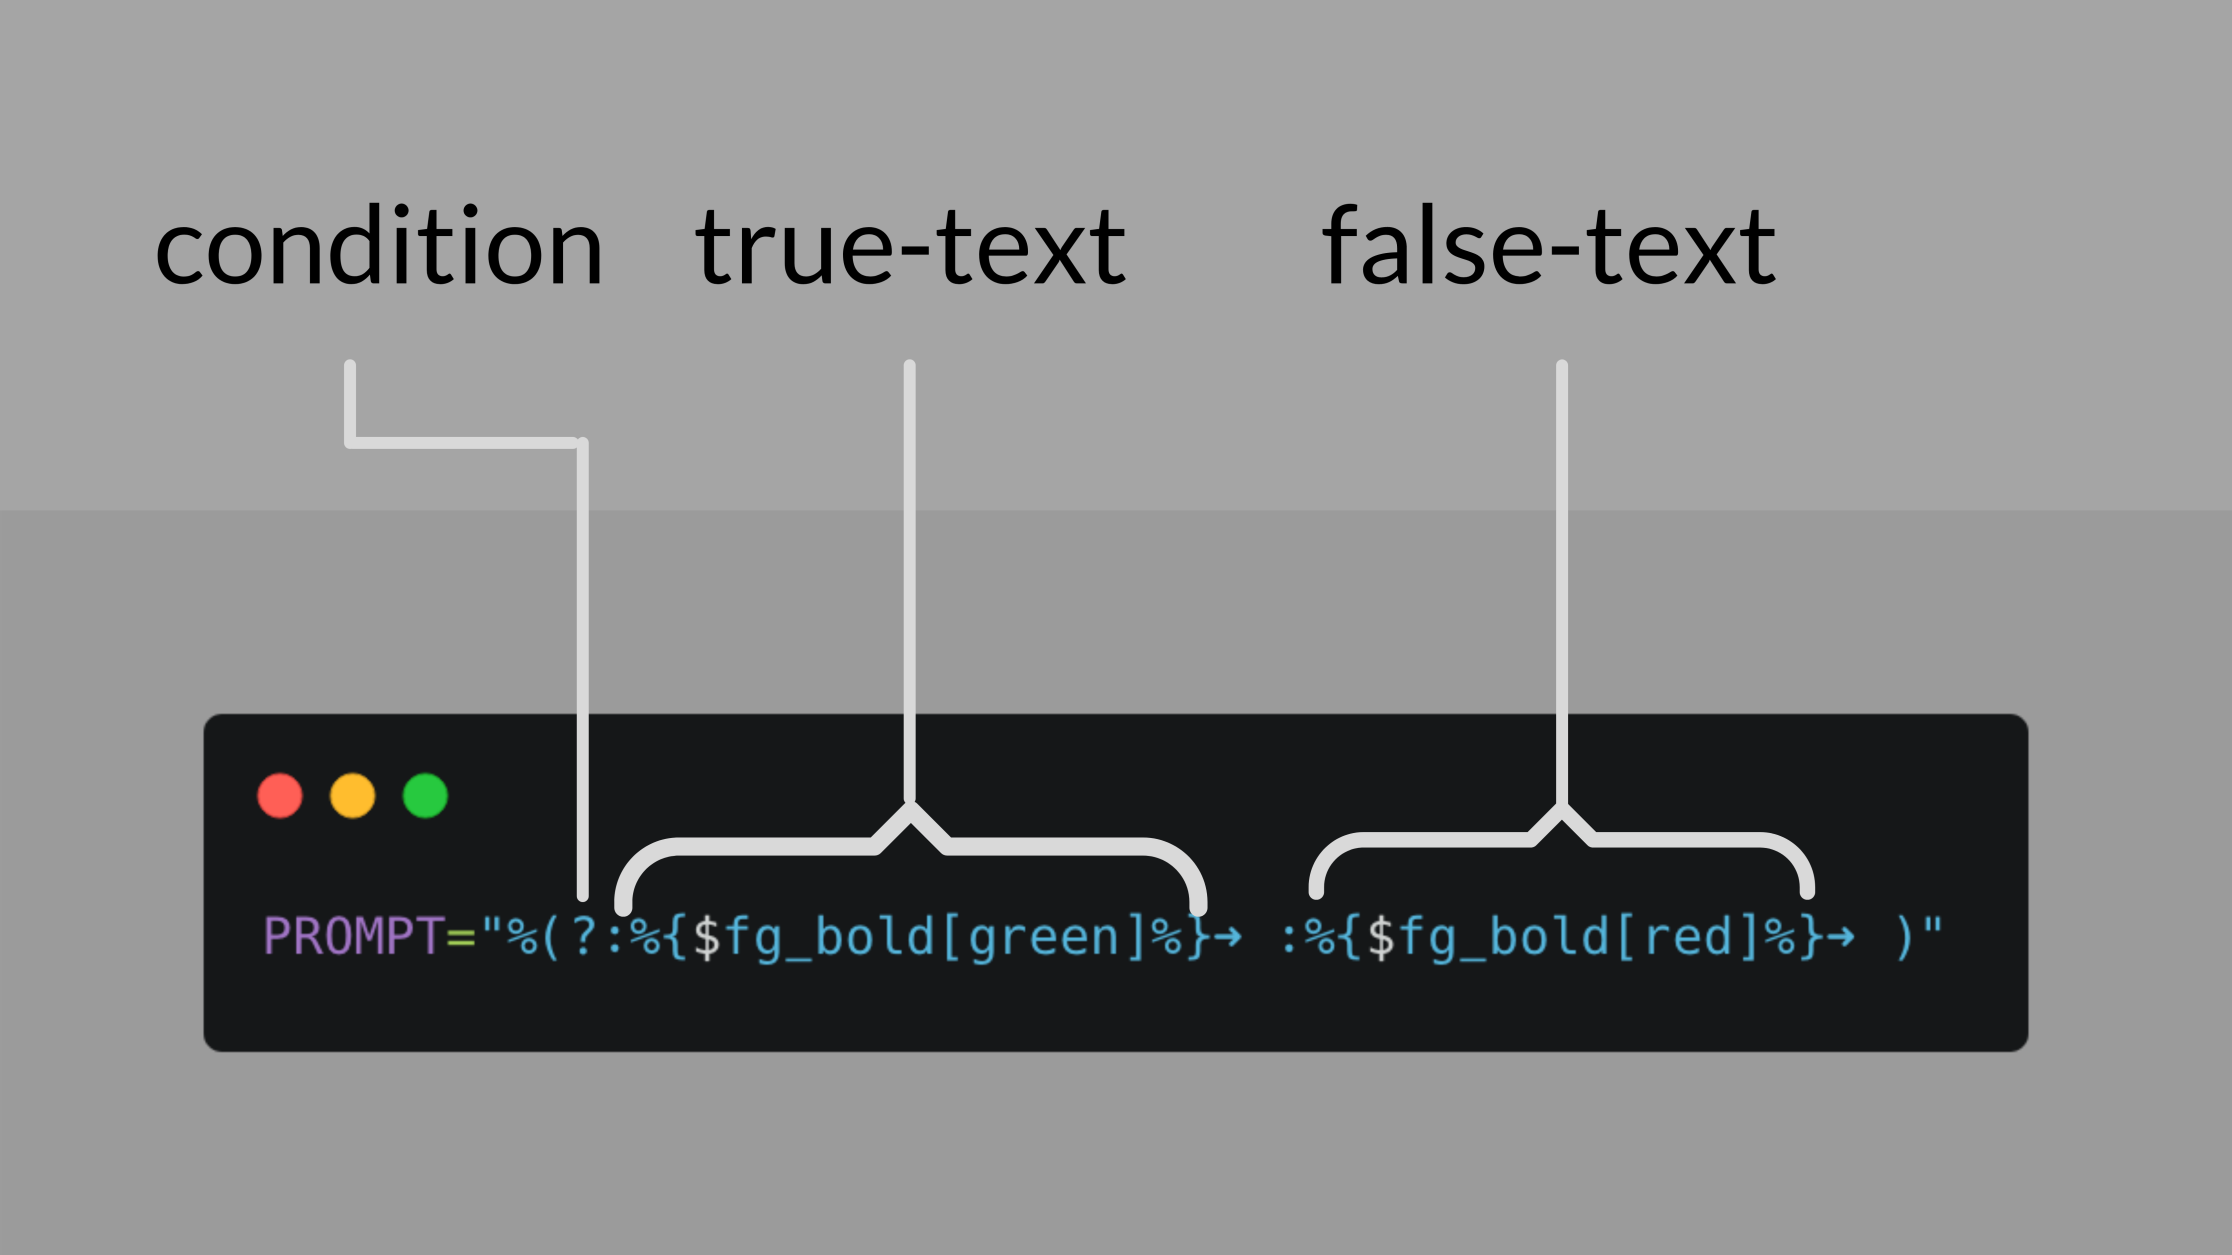
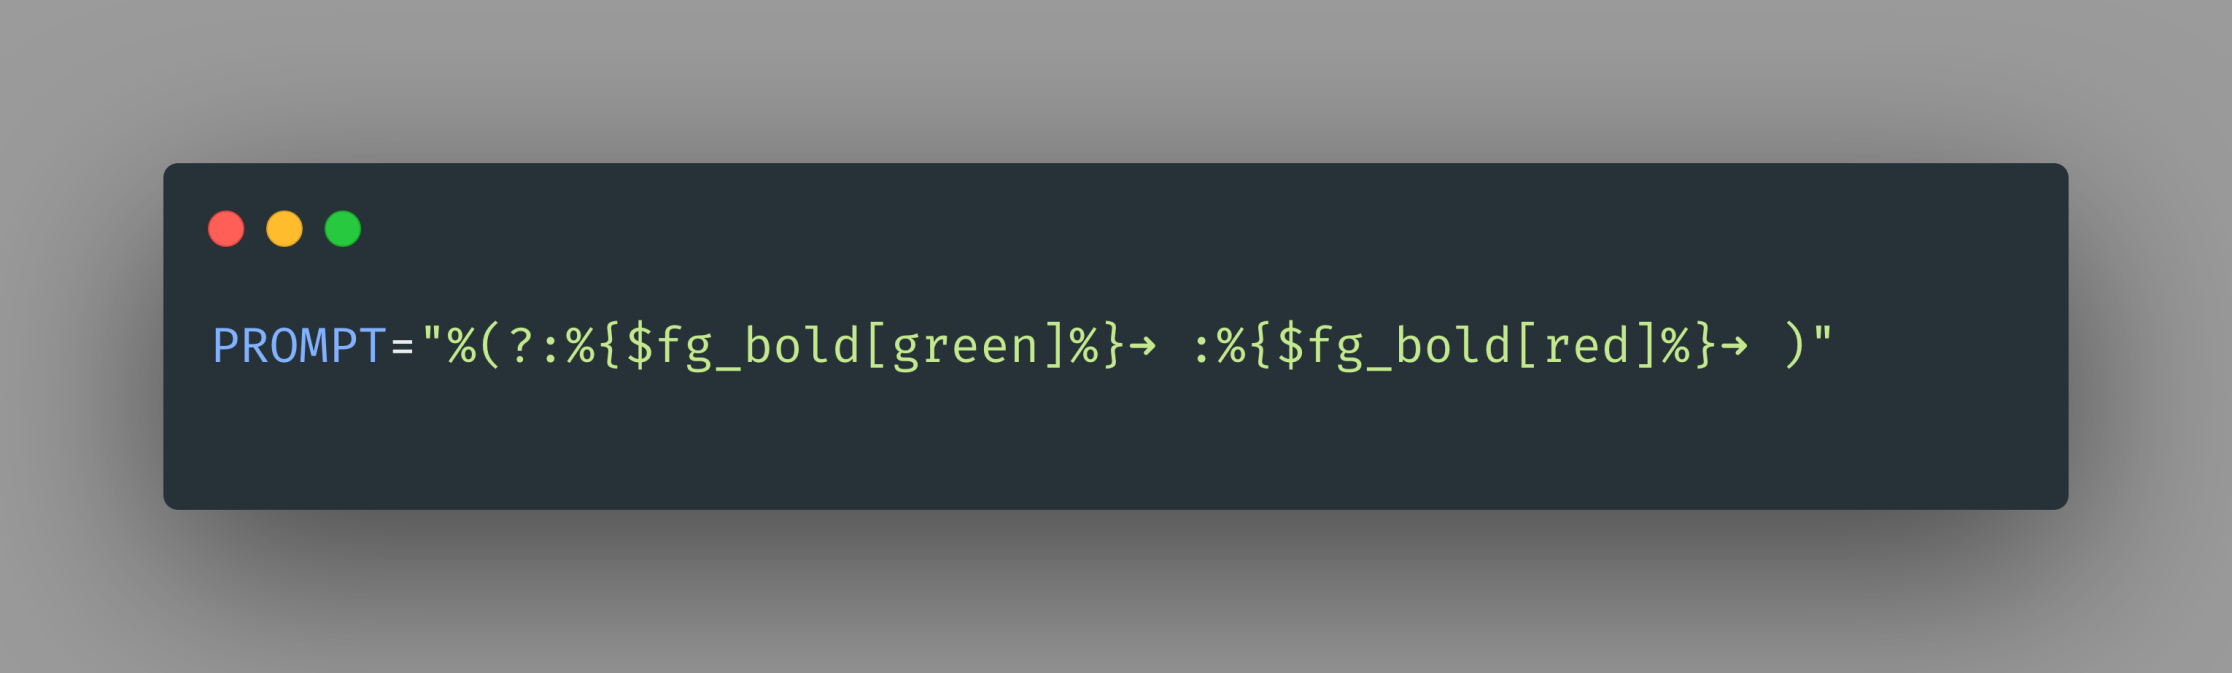 Here the prompt follow the following pattern
| |
It specifies a ternary expression. Meaning it checks for condition, if the condition returns true then it will show ‘true-text’ in the prompt, otherwise it will show ‘false-text’. Here the condition is specified by the "?” mark, which indicates whether or not the last command was executed successfully. If the last command executes successfully then the true-text will show on prompt, otherwise, the false-text will show.
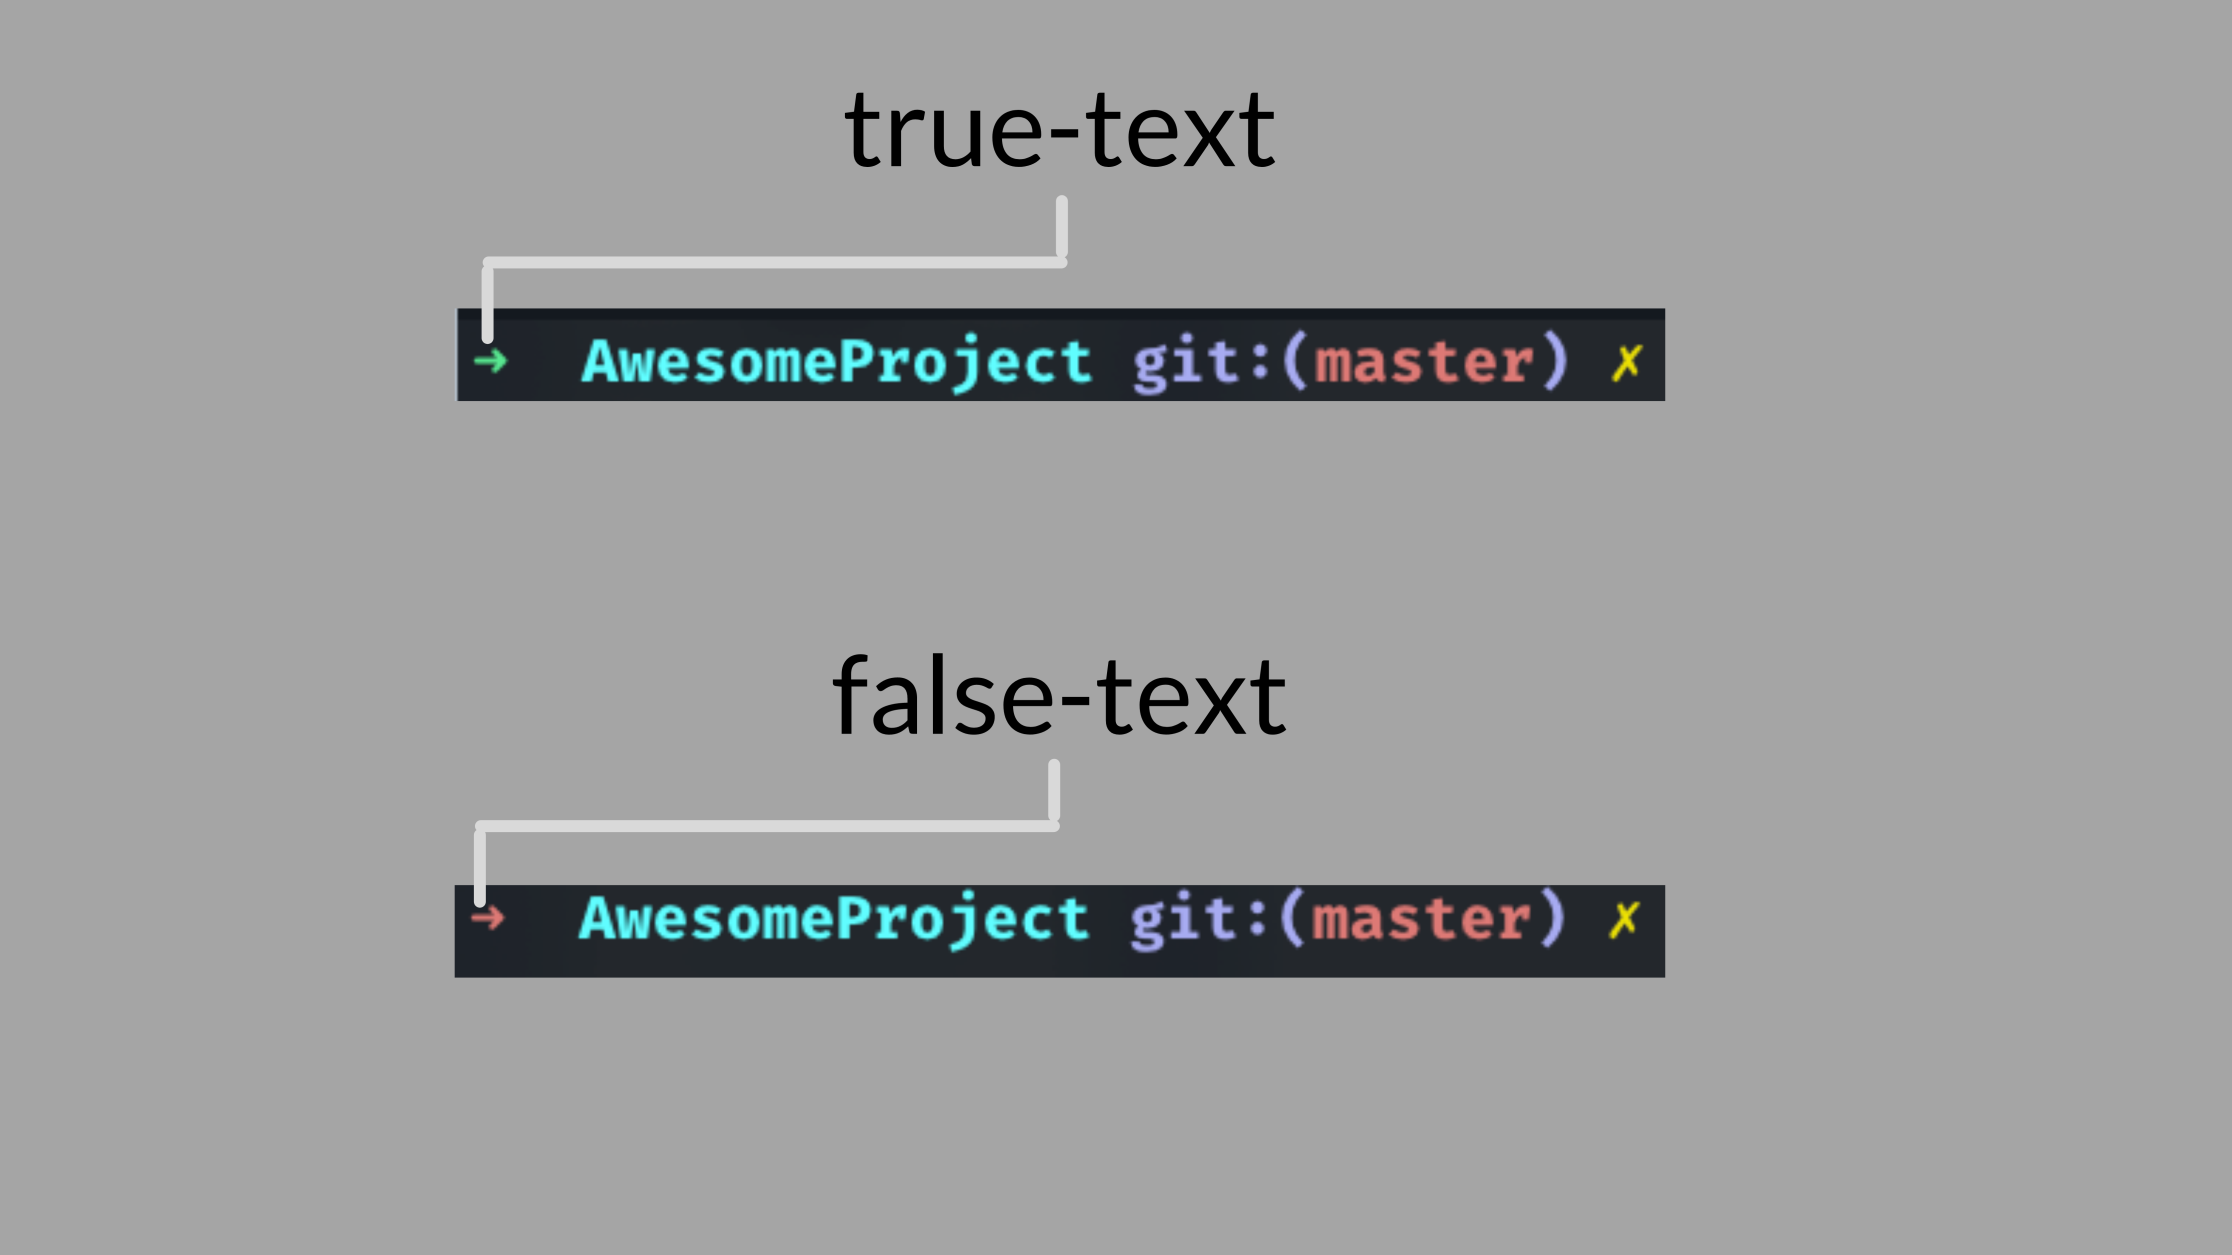
Now let’s look at our formatting of true-text. Our true-text is divided into two parts. One defines the formatting and color and the other defines actual things to show.
1st part
| |
It follows the following pattern
| |
We define our colors and the formatting between them. Here, it uses the pattern of ‘colors’ function that ships with zsh by default.
We can define colors in three ways:
We can use named color (used in robbyrussell.zsh-theme) instead of ‘green’ and in place of fg_bold the following settings can be used:
for foreground: fg, fg_bold, and fg_no_bold
for background bg, bg_bold, and bg_no_bold
Another way of setting colors is using the following pattern
| |
so our code of true-text will be
| |
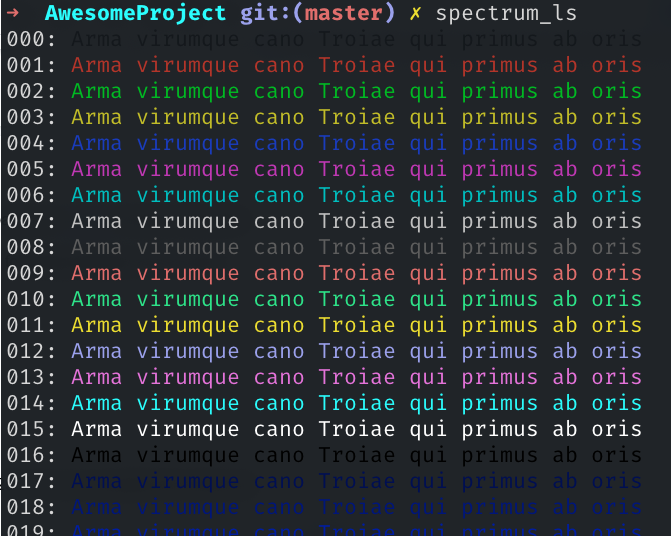
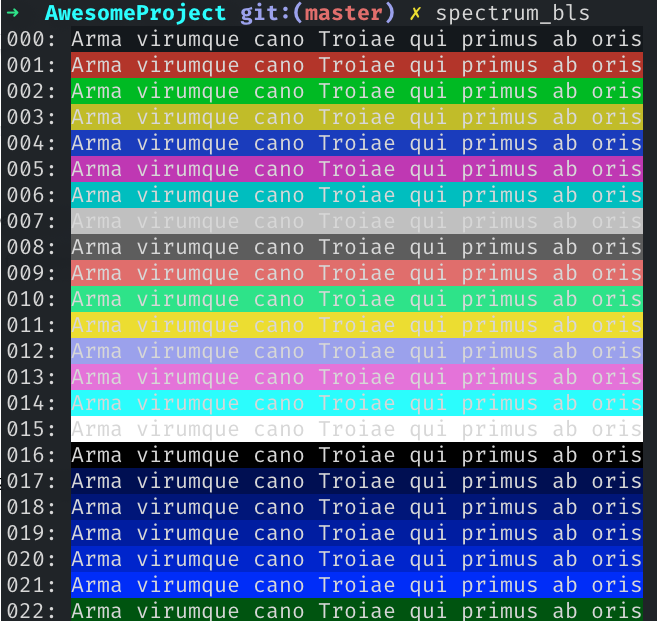
oh-my-zsh uses Spectrum under the hood to define the color code 0-255. You can visualize the whole set of color by running the following command
| |
| |
- However we are using the third way using the following pattern
| |
iterm2 supports true color. So we can use any hex color code. let give the hex color for both true-text and false-text. After that our code for prompt should look like the following
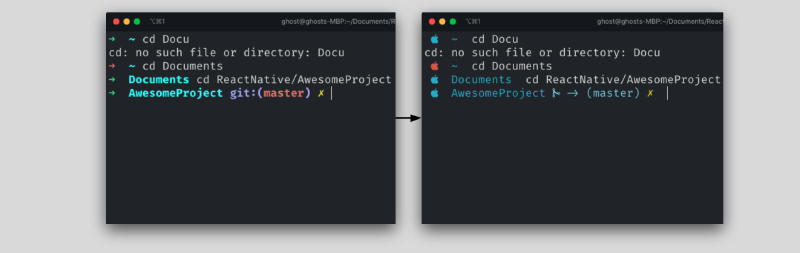
 our terminal now looks like the following:
Now let’s change the arrow sign to the apple logo.
After searching for a long time I’ve finally found the icon. Here is that apple logo.
Now you may not see it here, but just copy-paste that on the prompt code then you’ll the logo on the prompt. After adding the logo our Prompt code should look like the following:
 Now our prompt should look like this.
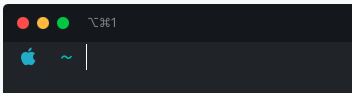
PROMPT+:
Now let’s take a look at the 2nd line of our theme.
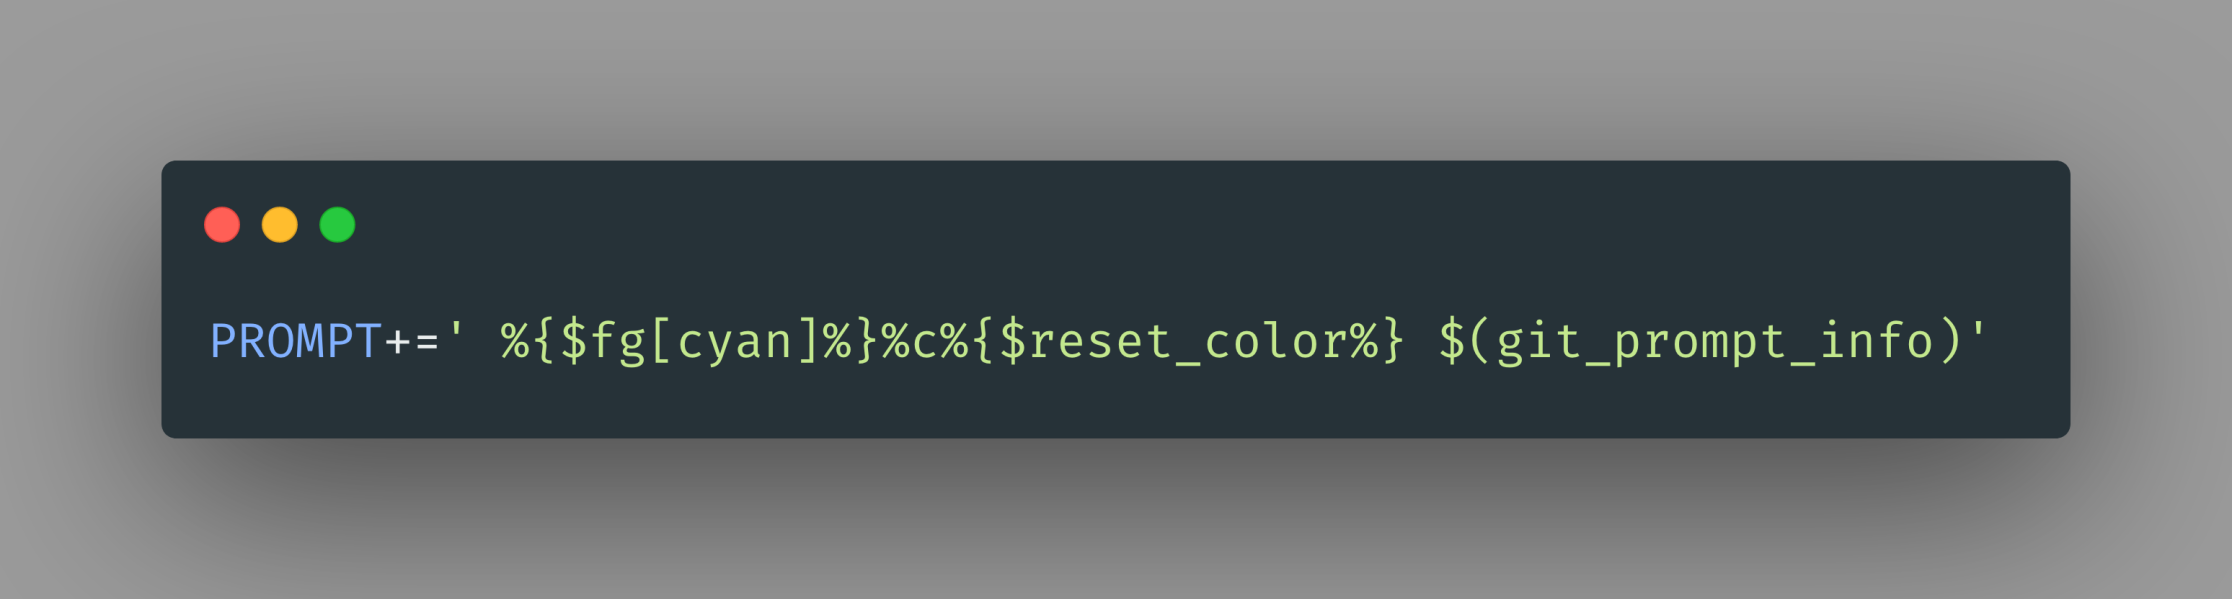
There is nothing much to change. we will change some color. First, let’s understand what does it mean:
1st part: which space indicate the spacing from our apple icon to our current directory name
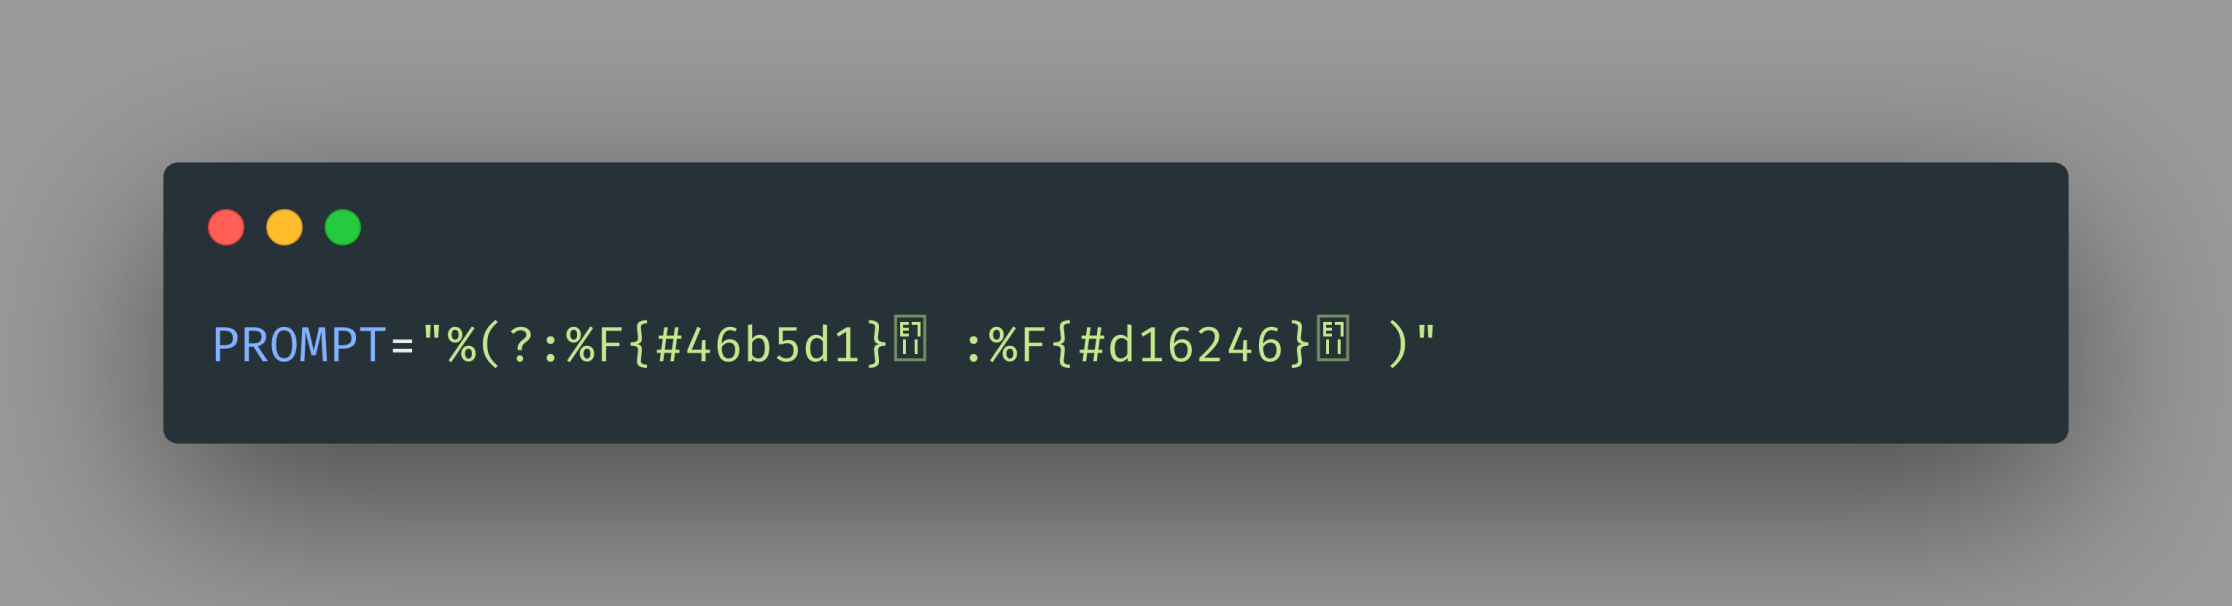
2nd part:
%{$fg[cyan]%}indicates the color of our current directory. let change it to%{%F{#46b5d1}3rd part: %c indicates that the prompt will only show the last component of the current directory path.
4th part: in short the string
“%{$reset_color”indicates that the input text will be different than the rest of the prompt like the following:
if you delete
%{$reset_colorthen the input text will be just like the rest of the prompt like the following: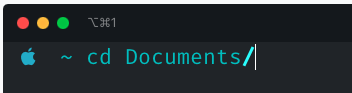
5th part:
$(git_prompt_info)indicates that the basic info of git SCM of the current directory will show just after a white space from the current directory like the following:
However, the way that git_prompt_info will show us the information is defined by the following code snippet
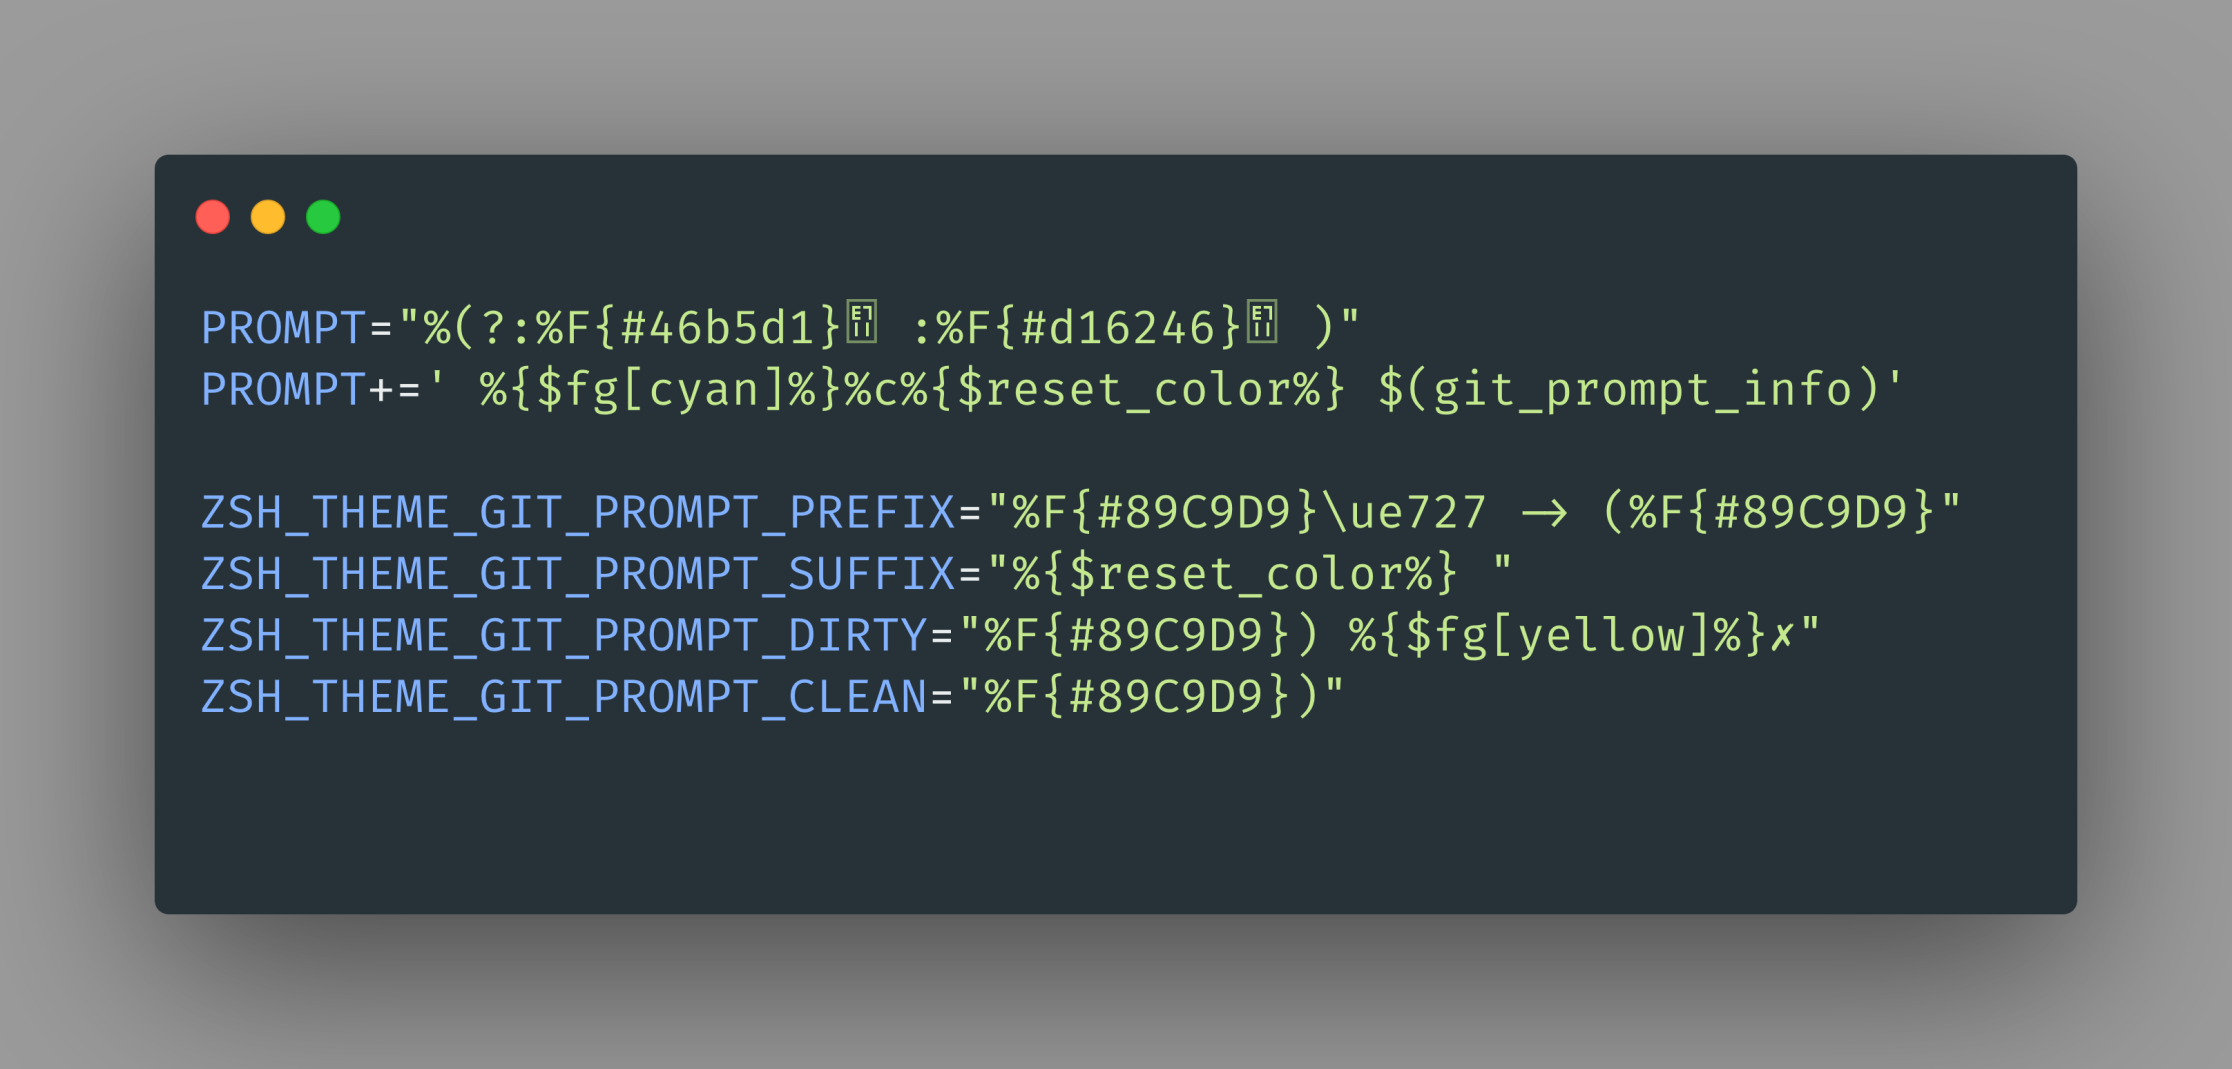
| |
ZSH_THEME_GIT_PROMPT_PREFIX variable the UI configuration on how the text git:( will show. there are 3 parts that this variable contains:
%{$fg_bold[blue]%}defines the color of the 2nd part (what will actually be showing)git:(, this string will actually be showing.%{$fg[red]%}defines the color of the branch name. in our case that is the master branch
ZSH_THEME_GIT_PROMPT_SUFFIX variable ensures the input text color is different from the rest of the prompt.
ZSH_THEME_GIT_PROMPT_DIRTY variable will take effect if the branch is dirty. it contains 4 part
%{$fg[blue]%}defines the color of 2nd part of 1st bracket)2nd part of that 1st bracket%{$fg[yellow]%}define the color the next mark✗actual mark that will show when the branch is dirty.
ZSH_THEME_GIT_PROMPT_CLEAN variable defines the rest of the prompt when the branch is clean. it has 2 part
%{$fg[blue]%}defines the color of the next element)actual element to show.
Now let’s make changes in the following places
- Replace all
%{$fg_bold[blue]%}and%{$fg[blue]%}and%{$fg[red]%}to this%F{#89C9D9} - Replace
git:to\ue727 ->in ZSH_THEME_GIT_PROMPT_PREFIX
After doing all the above your 4 variable related to the git prompt should look like the following
| |
Now your prompt with git info should look like the following.
Now the whole code for our custom prompt should look like the following:
| |
That’s it for today. If you have any questions feel free to ask.